Smart Card Method
The Smart Card content area enables administrators to establish, configure, assign, and maintain contact smart cards so users can authenticate to a system using smart-card-based certificate authentication.
There are seven Smart Card content areas.
Content area | Description |
|---|---|
Profile List | Provides an overview of the configured Smart Card card Profiles. |
User Notification Settings | Configures the schedule for notifying users prior to certificate expiration. |
PIN Policies | Provides the ability for organizations to establish PIN selection policies similar to that traditionally used with Active Directory passwords. |
Certificate Sets | Manage certificate templates, card enrollment settings, and CSP selection to be included in a Smart Card card Profile. |
New Profile | Provides the ability for organizations to create custom profiles that can then be paired with Sets and assigned to users. |
New PIN Policy | Provides the ability to create custom PIN policy beyond that delivered by default with RapidIdentity Server. |
New Certificate Set | Configure new set containing certificate templates, card enrollment settings, and CSP selection to be included in a Smart Card card Profile. |
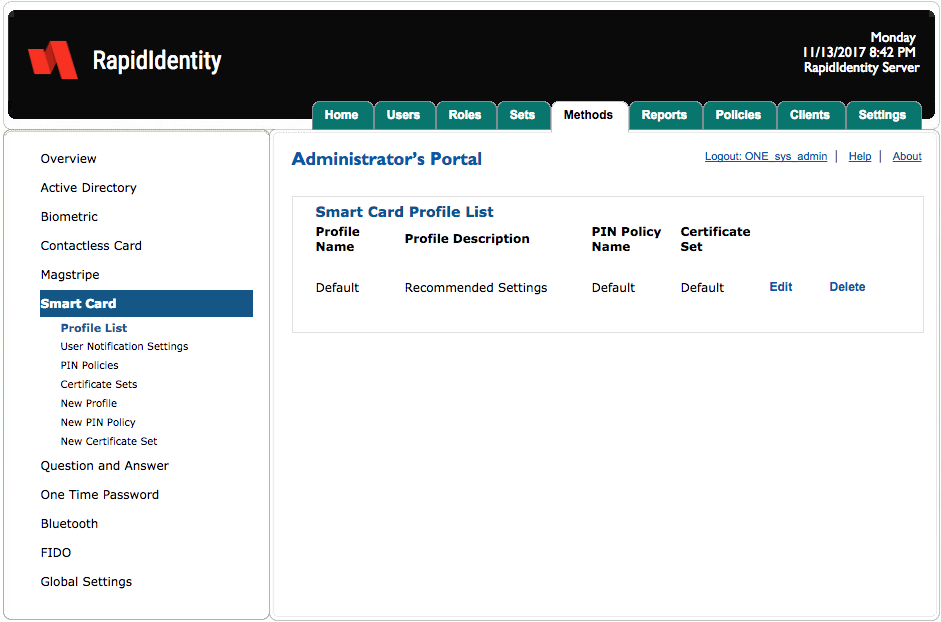
Smart Card - Profile List

Smart Card Profiles can be edited or deleted by clicking Editor Delete, respectively.
Smart Card - Edit Profile
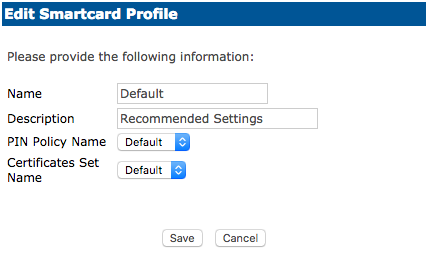
After modifying the default settings, click Save or Cancel to discard.
User Notification Settings
Administrators may automatically notify users prior to the expiration of one or more certificates issued from within RapidIdentity Server.
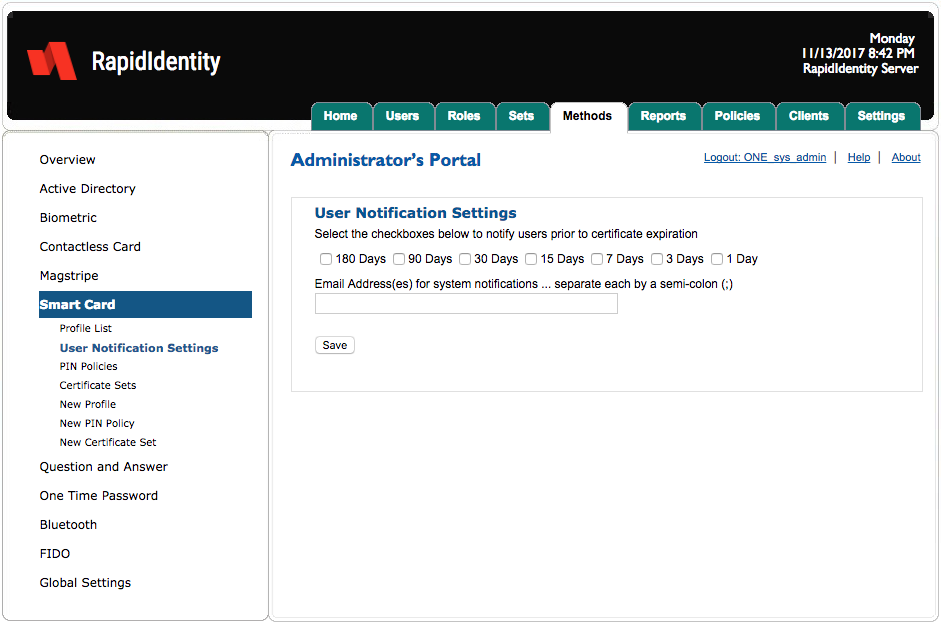
Select the desired time ranges and click Save.
Users will receive an email on the configured number of days prior to certificate expiration with an embedded link allowing the user to automatically renew the expiring certificate. The user will continue to receive notifications for each of the increments configured until the user successfully renews the expiring certificate.
To receive notifications the user must have a valid email address configured within RapidIdentity Server and RapidIdentity Server must be configured to support emails, as outlined in the RapidIdentity MFA & eSSO Installation Guide.
Smart Card - PIN Policies
PIN Policies enables administrators to create custom PIN policies and edit out-of-the-box PIN policies.
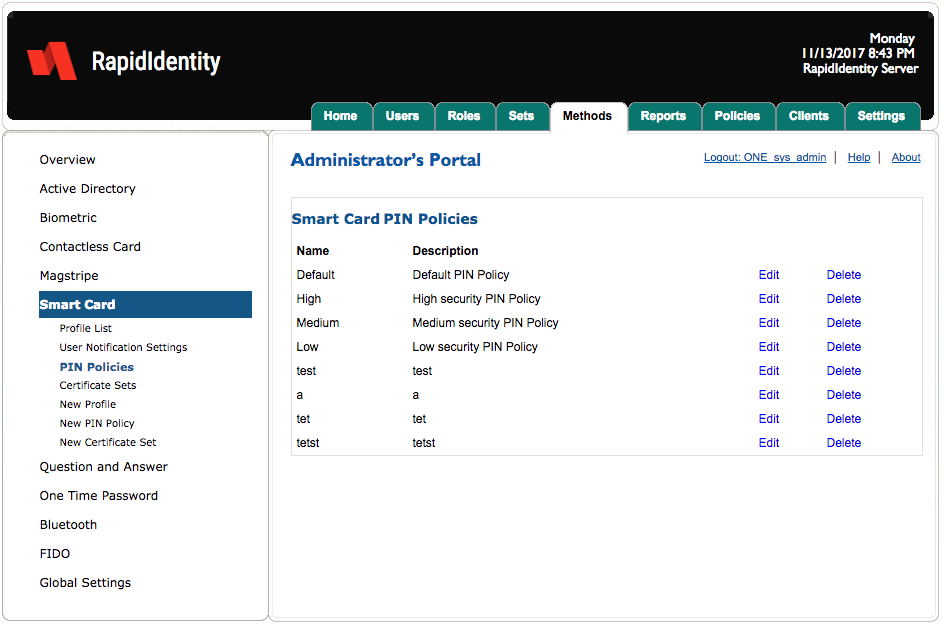
By default, there are four PIN policies with varying degrees of security from High to Low. The default PIN Policy contains a policy based upon best practices. The process to edit, delete, and assign Smart Card Pin Policies is identical to other PIN policies describe previously.
Smart Card - Edit PIN Policy
To edit a PIN policy, click Edit.

After updating the initial settings, click Save or Cancel to discard.
Certificate Sets
Certificate Sets represent single or multiple certificate templates that may be issued to users and user smart cards.
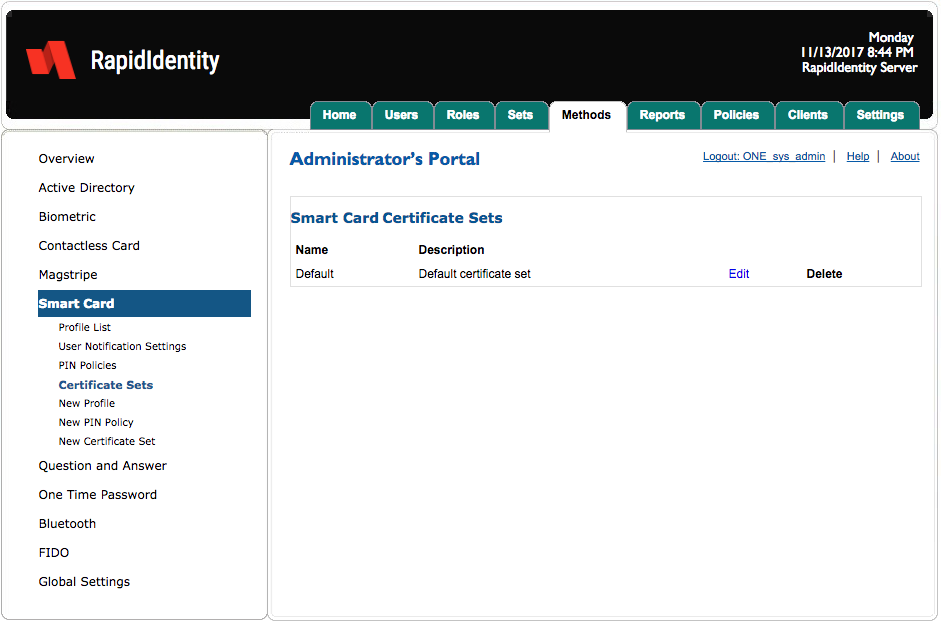
This screen displays any configured Certificate Sets and allows those sets to be edited and deleted.
The Default Certificate Set is visible but does not contain any certificate templates.
Smart Card - Edit Certificate Set
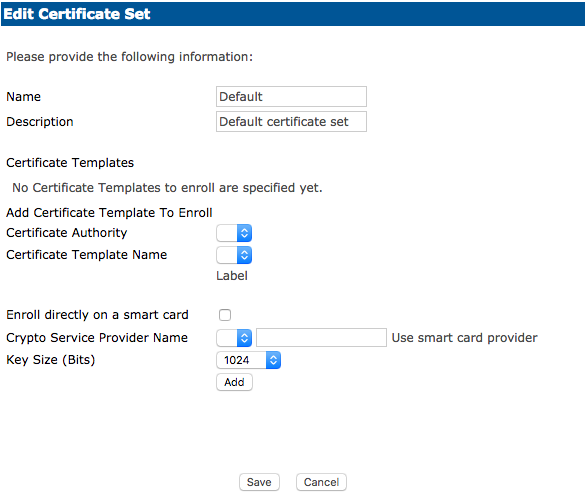
After updating the certificate settings, click Save or Cancel to discard.
Smart Card - New Profile
The process to create a new Smart Card Profile is analogous to previously described methods.
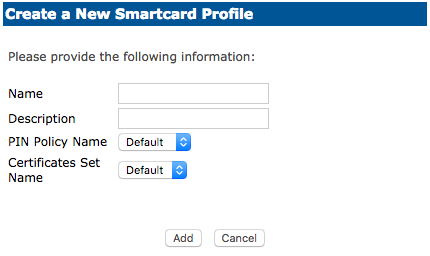
After modifying the settings, click Save.
Smart Card - New PIN Policy
The process to create a new Smart Card PIN Policy is analogous to the creation of new PIN policies described previously.
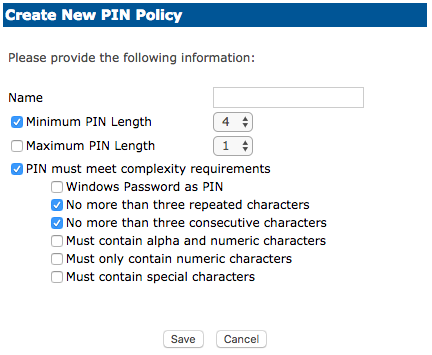
Name the new policy, select the desired settings and then click Save.
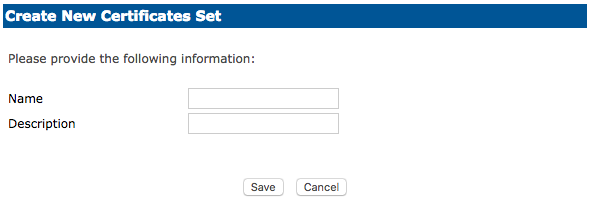
Smart Card - New Certificate Sets
Certificate Sets allow an administrator to assign one or more certificates to a Certificate Set that can then be assigned to a Smart Card Profile and associated with users during contact smart card issuance.
Follow these steps to create a new certificate set.
Click New Certificate Set, enter a name and description, and then click Save.
Update the configuration settings in the Edit Certificate Set template as necessary and then click Save.
For certificates issued directly to a smart card, click Enroll directly on a smart card.
Click Add to add the desired template to the Certificate that will be installed on the user’s smart card.
Click Save.
The new template will appear the list of Certificate Templates included in this Certificate Set.
Only check the Enroll directly on a smart card checkbox for templates that need the private key generated on the smart card itself and do not require the key to be archived. Certificate templates that require key archival and recovery, such as encryption certificates, should not have this checkbox checked. Even though this checkbox is not checked, the certificate will still be imported to the user’s smart card when the issuance process is complete. To add multiple certificate templates to this Certificate Set, click Add between each template.